Saturday, November 14, 2020

Yeti or Not... It's Christmas Time... a Makers Movement Post....


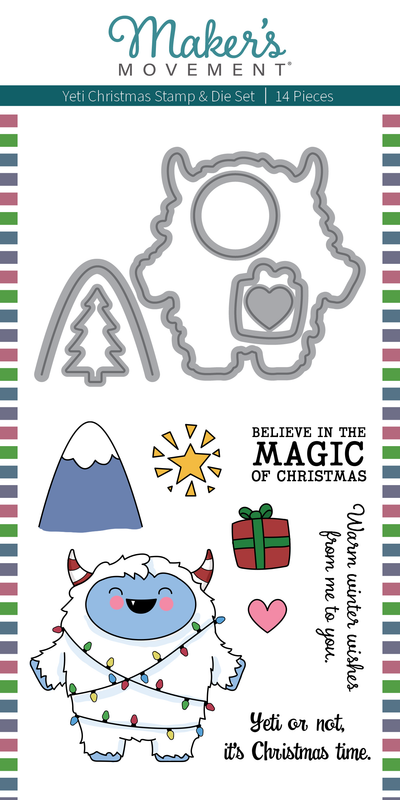
Hey there friends and fellow crafters, LeeAnn here with a cute stamp and die set from The Makers Movement called Yeti Christmas !!!


I had so much fun with this set, and if you sit back and relax, I'll tell you how...
  1. Stamp out the Yeti and packages using Memento Tuxedo Black on 110lb cardstock and use the coordinating dies to cut them out, using the Makers Movement, Mini Maker.
  2. Using Alcohol Markers I colored up the images which I don't know about you, I love this time of year so I can color the Yeti.
  3. I used Shaded Lilac for the mountains which I added on using a blender brush.
  4. I used the die from the set to cut out the mountain tops, and then stamped the mountains. I used a Marvy Snow Marker to ice the mountain tops and my heat tool to set them. 
  5. I used my glaze pens to add color to the string of lights around our little Yeti. 
  6. Putting this card together I have a 4.25" x 5.5" top folding landscape card, a black panel cut as a layering panel and then my main panel which is 4" x 5.25".
  7. The Aqua background paper is from A Cozy Christmas slimline paper pack. 
  8. I finished the project off by adhering the mountains using Glue Dots tape runner, and using the Foam Cutter Dies to cut strips to pop up the Yeti and Gifts. 
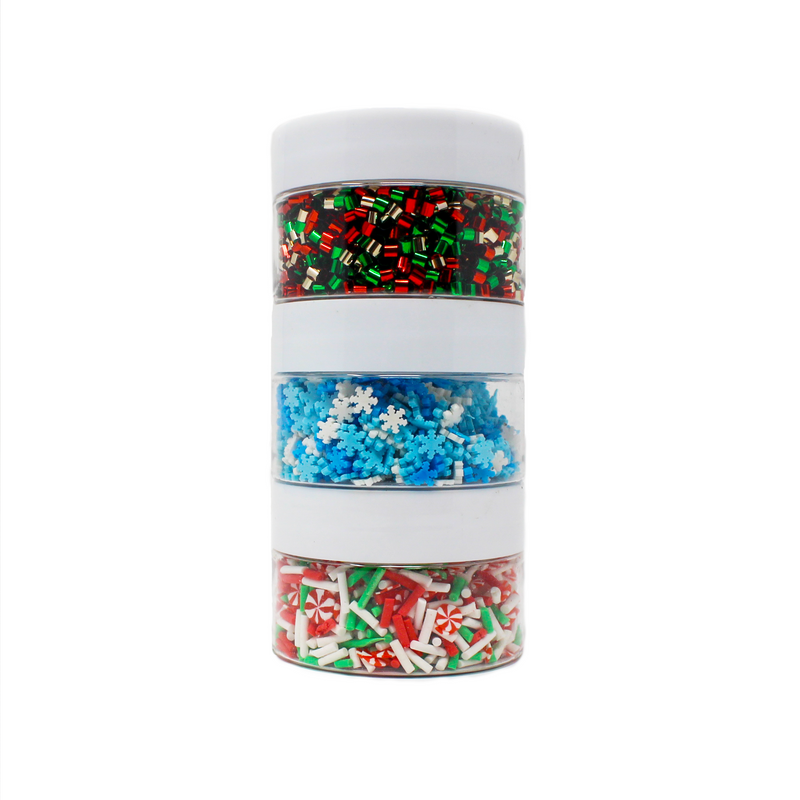
  9. I added a few snowflakes from the Jingle Bells Shaker Pack and with that my project was complete.

I hope you have enjoyed this project, I really did have a great time making it, and will be making a few more just like it for family this year.


Disclosure: The links below are affiliate links. If you decide to use these links to shop, you are supporting LeeAnn in her crafting venture - thank you! She may receive a small portion of the sale, at no extra cost to you. These products are endorsed by LeeAnn, and I hope you will love them too.
Recollections 110 lb Cardstock
Shop at:
MISC
Double Sided Adhesive Foam
Shop at:
MISC
The Makers Movement Mini Maker
Shop at:
MISC
The Makers Movment Yeti Christmas
Shop at:
MISC
The Makers Movment Foam Cutters
Shop at:
MISC
A Cozy Christmas Slimline Paper Pad
Shop at:
KS
Jingle Bells Shaker Sprinkles
Shop at:
MISC
Glue Dots Permanent Tape Runner
Shop at:
MISC
Memento Tuxedo Black
Shop at:
KS

Saturday, November 7, 2020

Season's Greetings, A Gina K Challenge Entry

 Hey there friends and fellow crafters, LeeAnn here with a project I made using Gina K Designs new Sparkle and Shine Card Kit, and this challenge is being entered into the November Challenge Red/White with a Tag. 


I cut a panel of white cardstock to 4" x 5.25" and my red panel is just slightly larger. My card base is 4.25" x 5.5". 
On the white layer I used Silver Glitter Paste and spread it through the stencil using my Stencil Pal. As soon as I was finished I washed both the Stencil Pal and Stencil with warm water so the glitter paste did not stick to it. 
I then took a panel of white cardstock and Red Velvet and cut out the tag using the middle size tag die that came in the kit. The tag does have stitching, which I cut off on the white tag. I also used the middle size Snowflake die and cut it out of the white tag, I then used Connect Glue to adhere all the little pieces where they are supposed to be within the snowflake. 
The sentiment came from the Sparkle and Shine Stamp set, which I stamped using VersaMark sticky ink and heat embossed using Extra Fine Silver Embossing Powder.
I used the GinaK Dot Runner to adhere the stenciled panel, and the Red Velvet panel to the card base. 
I also used the dot runner to adhere the tag together. which I popped on the stencil panel using foam tape.
Finishing touch was adding the red ribbon with white stitching to the top of the tag and this project was complete. 

I hope you have enjoyed his project today. I'll be back again with more projects using this great kit, and if you would like to see what is included... here is my unboxing video...

Have a crafty day!!!


Disclosure: The links below are affiliate links. If you decide to use these links to shop, you are supporting LeeAnn in her crafting venture - thank you! She may receive a small portion of the sale, at no extra cost to you. These products are endorsed by LeeAnn, and I hope you will love them too.
Pixie Spray
Pixie Spray
Shop at:
KS
Scrapbook Adhesives Foam Squares
Shop at:
KS
VersaMark
VersaMark
Shop at:
SBC
Sparkle and Shine Kit (Sold Out)
Shop at:
MISC
Stencil Pal
Stencil Pal
Shop at:
MISC
Connect Glue
Connect Glue
Shop at:
MISC
Dot Runner
Dot Runner
Shop at:
MISC
GinaK Designs White HeavyWeight Cardstock
Shop at:
MISC

It's the COFFEE-EST Time of the YEAR!!!


Greetings friends and fellow crafters, LeeAnn here with a Clean and Simple card I made using Papers from the Kat Scrappiness Cuppa Christmas Slimline Paper Pad, and I felt this gift card matched the paper PERFECTLY!!!


After looking at this Cuppa Christmas paper pad I decided there was SOMETHING FUN I could do... The pattern paper pad is 4" wide by 10.75" long, I cut 2 panels at 5.25" and had a .25" strip remaining for the inside of one of my cards. I cut a black panel slightly larger than my cardstock to be the layering panel, and then attached to an A2 size card base. 

Kat Scrappiness is a super sponsor and is offering 15% off Fall, Autumn, Coffee, Halloween and Thanksgiving in the store use coupon code: FALLCOFFEE2020.

I hope you enjoyed this card, it will be entered as link up 277 in the 2020 Fall Winter Coffee Lovers Blog Hop!!!

#fallwinter2020clh

Cuppa Christmas 2


Greetings friends and fellow crafters, LeeAnn here with a Clean and Simple card I made using Papers from the Kat Scrappiness Cuppa Christmas Slimline Paper Pad, the "Got Coffee" sentiment die and a Starbucks Gift card. 


After looking at this Cuppa Christmas paper pad I decided there was SOMETHING FUN I could do... The pattern paper pad is 4" wide by 10.75" long, I cut 2 panels at 5.25" and had a .25" strip remaining for the inside of one of my cards. I cut a black panel slightly larger than my cardstock to be the layering panel, and then attached to an A2 size card base. 

Kat Scrappiness is a super sponsor and is offering 15% off Fall, Autumn, Coffee, Halloween and Thanksgiving in the store use coupon code: FALLCOFFEE2020.

I hope you enjoyed this card, it will be entered as link up 278 in the 2020 Fall Winter Coffee Lovers Blog Hop!!!

#fallwinter2020clh

Cuppa Christmas Clean and Simple Cards


Greetings friends and fellow crafters, LeeAnn here with a Clean and Simple card I made using Papers from the Kat Scrappiness Cuppa Christmas Slimline Paper Pad, the "Got Coffee" sentiment die and a Starbucks Gift card. Oh, and that little piece holding the gift card is the wrap die from the Layered Coffee Cup set. 


After looking at this Cuppa Christmas paper pad I decided there was SOMETHING FUN I could do... The pattern paper pad is 4" wide by 10.75" long, I cut 2 panels at 5.25" and had a .25" strip remaining for the inside of one of my cards. I cut a black panel slightly larger than my cardstock to be the layering panel, and then attached to an A2 size card base. 

Kat Scrappiness is a super sponsor and is offering 15% off Fall, Autumn, Coffee, Halloween and Thanksgiving in the store use coupon code: FALLCOFFEE2020.

I hope you enjoyed this card, it will be entered as link up 275 in the 2020 Fall Winter Coffee Lovers Blog Hop!!!

#fallwinter2020clh


Friday, November 6, 2020

Warm Winter Wishes with The Makers Movement

Hi there friends and fellow crafters. LeeAnn here with a fun project I made using the Warm Wishes Stamp and Die set from The Makers Movement!!!


I thought this set was just so dang adorable, and using pattern paper from my stash I just knew this was the project I was making with it. And I made this card specifically for the Fall/Winter Coffee Lovers Blog Hop. I look forward to this even every year, and work out projects to coincide with it.

For my background I blended Memento inks of Summer Sky, LuLu Lavender and Angel Pink. I did color my Gingerbread cookies with Alcohol Markers, and just had fun. 

I hope you have an awesome day, and head over to The Makers Movement to see what other fun stamp and Die sets they have available.
#fallwinter2020clh


Got Coffee? A Fall themed Coffee Card


IT'S THE FALL/WINTER COFFEE HOP Y'ALL!!!
I LOVE THIS TIME OF YEAR AND I KNOW THAT IT HAS ARRIVED BECUASE IT IS TIME TO BREAK OUT OF THE COFFEE STAMPS, PAPER AND DIES AND GET BUSY.
THIS IS MY FIRST PROJECT I MADE FOR THE FALL/WINTER HOP AND HAVE AT LEAST 4 OTHERS COMING ALONG SOON...


I made a MINI Slimline card for today's project. Using alcohol inks I make a panel from which I cut the Coffee Cup and Got Coffee sentiment, both available from KatScrappiness, I layered coffee themed pattern paper along with kraft cardstock to make my background panels. I finished off the card with 3 "Coffee Beans"... Have a great day and enjoy the rest of the 2020 Fall/Winter Coffee Lovers Blog Hop!

Kat Scrappiness is a super sponsor and is offering 15% off Fall, Autumn, Coffee, Halloween and Thanksgiving in the store use coupon code: FALLCOFFEE2020.