Good Morning Crafty Friends and Welcome to Kennedy Grace Creations September Blog Hop!
We are so happy you have stopped by and joined us for this very special event!
Our newest release of Stamp and Sequins is now live and available for purchase in the store!
Here is what I have created for you
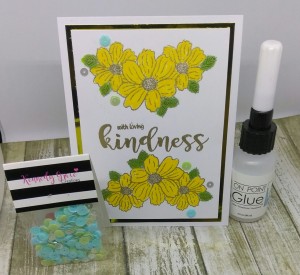
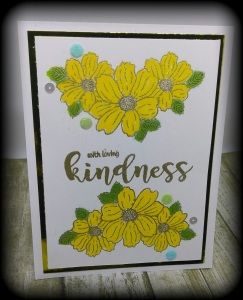
Greetings friends and fellow crafters, LeeAnn here today with my project for the Kennedy Grace Creations. For my project I used the Kindness Medley stamp set and sequin set by the same name.
The process of making this project is as follows...
1. Recollections 110lb cardstock panel cut to 3.75" x 5" and one cut 11" x 4.25" to use as my base. I also have 1 layer Jot Gold Mirror Paper cut at 4" x 5.25".
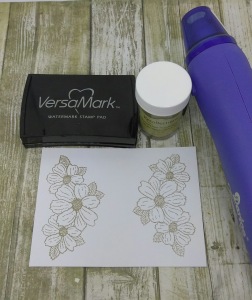
2. Using stamp platform of choice I placed my panel in the corner and positioned the flower stamp where I wanted it to be, I used my embossing buddy first where I planned on stamping, and then Versamark to ink up the stamp and make the impression on the panel, I then was able to turn the panel around and stamp the flowers again, and by doing it this way they were in the same position top and bottom.
3. I then used Recollections Fine Detail Gold Embossing Powder to cover the Versamark and a small paint brush to take away any strays.
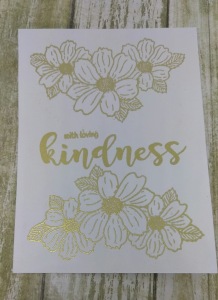
After warming my heat tool up for about 20 seconds, I was able to warm the embossing powder to a pretty gold finish. I do start the warming from behind, then move to the front once the melting starts. This I have found over the years is the best process for me.
4. Moving back to the stamping platform I positioned the sentiment stamps where I wanted them. Ran over the area with the embossing buddy, and used the Versamark again, sprinkled on the same embossing powder, and warmed it to melt.
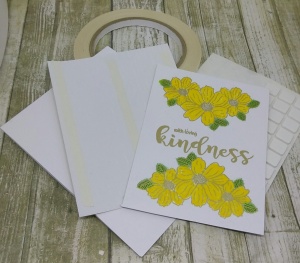
5. Once this part was complete, I used Memento Dandelion Marker to color the flowers and Cottage Ivy Memento Dew Drop with a Fantastix to color the leaves. I then went over the leaves with a yellow-green Wink of Stella glitter marker.
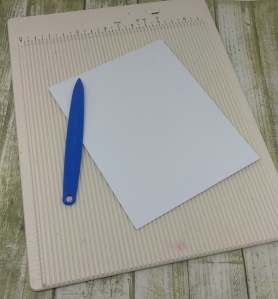
6. Now it was time to start putting the project together. Using my Score Board I made a score line at 5.5" mark in the 11" x 4.25" panel. This gives a great A2 base.
7. Using double side Tear It tape I attached the mirror panel to the base first, then used foam squares to attach the completed top panel to that.
8. My final step was to use OnPoint Glue to adhere the Kindness Medley sequins in the desired position.
9. Photos were then taken and edited with PicsArt app on my android phone.
I hope you have enjoyed my project today, please be sure to check out the posts from my team mates.
We will be giving away a prize package to one lucky winner.
All you have to do is join us for hop and leave a comment on each project. The more you comment the more chances you have to win!! Winner will be announced on Monday.
We hope you have enjoyed this release and will hop along to see what our talented designers have made using the Stamps and Sequins from our September release.
Your next stop is the lovely and talented:
Chera
But just in case you miss some one along the way I have included the entire hop for you!
Thank you for stopping by today!





Pretty - thanks for the step by step
ReplyDeleteGorgeous layout. The black really sets the card off.
ReplyDeleteSo bright and cheerful LeeAnn. Love all your wonderful steps xo
ReplyDeleteCool idea using the stamp on top and bottom. Thank you
ReplyDeleteSuch a beautiful card. Love how you've used the flowers.
ReplyDeleteThanks for the detailed instructions . Pretty
ReplyDeleteGreat card, love how you mirrored the image
ReplyDeleteLovely card. The black frame sets off the beautiful yellow flowers.
ReplyDeleteLove these flowers in yellow! Great tutorial, thanks for sharing it.
ReplyDeletePretty card! Love those yellow flowers!
ReplyDeleteGreat card, love the yellow- so cheery and friendly! Love all the pics you put in there, nice!
ReplyDeleteSo beautifuly done and love all of your tutorial details!
ReplyDelete