Tuesday, February 28, 2017

Happy Balloons with DCAM

DCAM HAPPY BALLOONS


Greetings DCAM friends and fellow crafters. Happy March, can you believe this year is flying by so fast, already in our 3rd month. Today I am bringing you a couple of cards I made using the

Balloon die set released in February from DCAM. I fell in love with this die set the minute I saw it and knew what I was going to be working on with it.
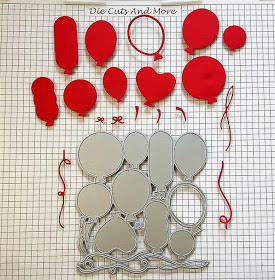
Balloons Die

So, here it goes...

You will see the both of my projects are birthday cards. It worked out well that I had this die to work with, as my mother in law needed a couple of birthday cards to send out this week.


For my first card, I used the Balloon, Border and Celebrate Dies to create the front. I ran the Balloon die through my Big Shot 3 times, once for each color used. This gave me a full set of each Balloon shape to have fun with. I had also run it through in white, however, I did not like the white on white background so saved it for my second project. I then carefully laid out the cuts so that I did not have the same color touching when set. The paper used was adhesive backed, so that made it really easy for sticking it down. The Celebrate saying I used a zig glue pen to adhere it down.
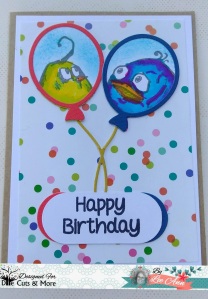
Let me say, it was fun using these birds again. I have had them in my stash pretty much since they first came out and have only used them a few times, this card just screamed for it. Remember I said above that I used the white balloons on my second project... well this is what I did, using my Stampoholic I stamped two of the birds on the balloons. I then used my Zig Clean Color Real Brush Markers to color the birds. The great thing about this Balloon set is if you notice there is a hollow balloon, well that one matches up to the balloon two over to the left, I was so happy to realize this, as I used the hollow to make the top layer. I used a light dusting of Salty Ocean distress ink for the background on the two balloons.
The piece I have the "Happy Birthday" sentiment stamped on is made using the long balloon in the top row of the set, and the red and blue end pieces were made using the bottom long balloon ends.

I really had a lot of fun making these cards, and I hope you enjoyed them as well.

Items from DCAM used in these projects:


Balloon Die

Celebrate Die


Double Stitched Border Card Shaper
download-5
Salty Ocean Mini


p1700683pm7l
Archival Ink


0000557747
Crazy Birds

DCAM Inverted Circles and Wine Tags

This is a post that went live on the DCAM blog January 31, 2017 but I forgot to post it here OOOPS. 

Greetings DCAM friends and fellow crafters. LeeAnn here today with a few projects I have made this crazy month and really wanted to share. I have to honestly say I have had so much fun with these new dies, and have another project in the works. So let me stop and show you what I did... Using the Wine Tag Die, Cheers Die and It's a Girl sets I went about this door welcome sign. Using Pink Recollections card stock for the base, followed by White Recollections and then the top layer is Vellum that has pink footprints on it. I have honestly had this paper for 2 years waiting for a chance to use it. I used my Xyron X to affix all the pieces to the vellum. I used Zots to affix the vellum to the base and my e-z runner to affix the cardstock layers. 


Next I made a bottle tag. This one is using the Wine Tag and the Cheers sets. Again I am using paper that has been in my stash for a while, starting with the base which has a marbled look. I then used my stitched circles to cut a circle larger than the Raise a Toast ring out of gold shimmer card stock. I cut a black circle the same size as the ring as well to help it with coloring. I used a mini Delicata Gold Shimmer ink to color the Raise a Toast ring.
The champagne flutes are cut out of vellum and the champagne and bottle top is cut from the same gold shimmer cardstock as earlier. 

Now for my favorite so far this month with the latest release. I have the Inverted Scalloped Circle Dies, and the first thing I thought of was a bulls eye, From there I went a step further and further into my scrap paper file and went with the bulls eye rainbow. I also used the Lawn Fawn "you color my world" stamp/die set Released Summer 2015 to finish off this project. I used Zig Clear Brush markers for coloring and Kaleidacolor Spectrum pad to stamp the sentiment. My e-z runner was used to affix all the bulls eye layers and 3L foam dots for the Crayons to add a bit of dimension.
Products used:
Wine Tag Die


Cheers Die Set

Its A Boy/Girl Die
Inverted Circle Dies
Delicata Gold


Lawn Fawn Stamps

Zig Clean Color Real Brush Markers

Quick Quotes- Friends with LeeAnn

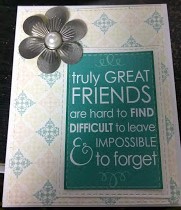
Greetings Quick Quotes friends and fellow crafters, it is hard to believe my first month with Quick Quotes is coming to an end already. I really have to say I LOVE the papers and the PowderPuff Chalk Inks just amaze me everytime I use them. Today I am showing them used in a way I wasn't sure would be possible and wow...

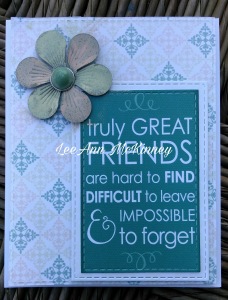
Using paper from an upcoming collection called Windsong and a pretty flower from the metallic embelishments kit, I went to work.
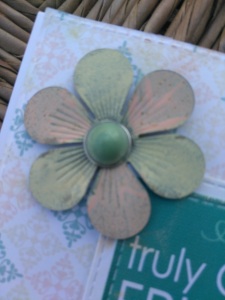
First I figured out the paper for the background which is this really pretty pattern WS105, Using the colors that matched the paper I chalked the petals using Peach Tree and Antique Linen. I also decided to use Seafoam on the pearl for that extra pop.

Using dies from my stash I cut the panels for my A2 card base. And using my 3L easy runner I adhered it all down. The Pearl for the center of the flower is a brad so using my Perfect Setter set I made the hole necessary to hold the brad and flower in place. I did use some 3L dimensional's to hold the flower petals up in place. 
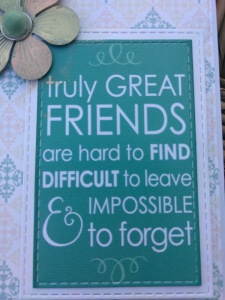
I have added a few close ups of the project so you can see it a little better.  


QQ Supplies Used:
Papers from upcoming collection- Windsong-WS105
Sentiment from Sheer Joy -SJ500
Unique Rustic Patina Metal Embelishments
Seafoam PowderPuff Chalking Ink
PeachTree PowderPuff Chalking Ink
Antique Linen PowderPuff Chalking Ink

Other Items Used:
Rectangle Stitched Dies by Gina Marie

Thank you for visiting, and I hope you have enjoyed this project. Please come visit again.

Monday, February 27, 2017

Joy Clair and Be Brave

Greetings Joy Clair friends and fellow crafters. Today I am here with Joy Clair and the “Be Brave” stamp set from the February 2017 release. 
For this project, I made an A2 size card. Come on over to the Joy Clair blog and see how I made it.

Please follow Joy Clair's facebook pageColor by Faith Bible Journaling facebook pageInstagram and Twitter, be the first to hear the news, sales and giveaways! They also have a Pinterest page and Youtube channel for your inspiration!
Thank you for stopping by and please come back again soon!

Saturday, February 18, 2017

Joy Clair and the Aztec Borders

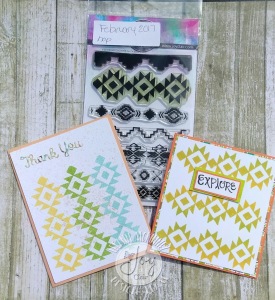
Greetings friends and fellow crafters, today I am here with 2 cards I made with the Joy Clair Aztec Background Builder set. This is part of the February 2017 release. I have to say I love this set and it really lends itself to watercolor quite nicely. Please hop over to the Joy Clair Blog to see how I made these cards. 
The first project I completed was this 4x4 “EXPLORE” card. 

My second project is an a2 sized “Thank You” card. 
I hope you have enjoyed my post using the Aztec Background Builder from Joy Clair as must as I have enjoyed sharing it with you.

Please follow Joy Clair's facebook pageColor by Faith Bible Journaling facebook pageInstagram and Twitter, be the first to hear the news, sales and giveaways! They also have a Pinterest page and Youtube channel for your inspiration!
Thank you for stopping by and please come back again soon!

Quick Quotes- Love Always by LeeAnn

Greetings crafty friends. LeeAnn here, with the Quick Quotes team bringing you a project I made this week with the items from the February Club Q kit.
I had a lot of fun with this project mainly because I was making it as an anniversary gift. My daughter's 4th wedding anniversary is February 15, and this page is going to be for her and my son in law.


For this project, I used pages from the Winter Bliss collection along with some white card stock that I chalked to make it the color I wanted. The main base is using QQP-WI102, and I used a second sheet of the same for the hearts, photo mat and the under layering of the chipboard LOVE.


The process to make this is as follows:

Using white cardstock and a set of Sizzix dies I cut out 2 sets of each size heart and then the smaller size was cut from the Winter Bliss.

The photo is a 4x6 size and I cut a base from the white card stock, and then slightly larger from the Winter Bliss. Using another Sizzix die and QQP-WI101 I cut 2 coordinating borders.

Once I had all my layers cut, I went to work with Baja Blue Powderpuff Chalk Ink which coordinates great with this paper. I chalked the larger heart layers and the smaller photo mat with the Baja Blue.

After this was completed, I used my 3L adhesives and started adhering the items to the base.

I think my favorite part of this project is the LOVE ALWAYS. These chipboard pieces are part of the Club Q kit, and after cutting down some clear acetate as an underlayer, I inked the pieces up using the Fuscia Powderpuff Chalk Ink. I love how it adds just enough color to make me happy. I adhered the acetate to the chipboard, then some foam dimensional tape all the way around. After figuring out where I was going to put the pieces on my page, I dropped some sequins in those spaces, then placed down the pieces. So now we not only have a 12x12 page with cascading hearts, but we also have two shakers as well to add interesting elements to the page.

I hope you all have enjoyed this trip down memory lane with me.

Quick Quote Items Used:
Winter Bliss 101-Club Q
Winter Bliss 102-Club Q
Baja Blue Powderpuff Chalking Ink
Fuchsia Powderpuff Chalking Ink

Other Items Used:
Various Sizzix Dies
Sequins
Acetate

Wednesday, February 15, 2017

Joy Clair and the Mardi Gras

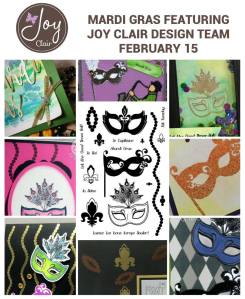
Greetings crafty friends. Today I am taking part in a fun inspiration time with Joy Clair featuring this fun Mardi Gras set.

Joy Clair Blog
When this project was announced to the team, I was telling my husband about it and my first project came to mind.
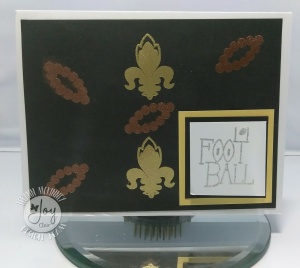
Due to the fact that I do enjoy watching Football (only because it is the only sport going on when NASCAR is in the off season) my two favorite teams which are actually rivals are the New Orleans Saints and the Atlanta Falcons. So this first project is in honor of the New Orleans Saints. All images were stamped with Versamark and then heat embossed using Recollections embossing powder in Gold and Copper. I thought the one bead necklace/bracelet ring looked a lot like the shape of a football, so I figured why not. The Football sentiment is from the Fall Planner set and heat embossed with silver glitter powder.
Project 2
After completing this project I thought about making another one since those masks just sat there not being used. So I went to work with it, stamped the masks three times on an angle and heat embossed with Ranger white embossing powder. I then used Distress ink daubers to color my page. Using a Lawn Fawn die I cut the image and then adhered it to a black card base. I finished this off with 2 brads from my stash.

I hope you have enjoyed my projects today. I know I had a lot of fun making them.

Be sure to come back and visit again soon. Head over to the Joy Clair blog and see what the rest of the designers have created with this set.

 Please follow Joy Clair's facebook pageColor by Faith Bible Journaling facebook pageInstagram and Twitter, be the first to hear the news, sales and giveaways! They also have a Pinterest page and Youtube channel for your inspiration!
Thank you for stopping by and please come back again soon!

Thursday, February 9, 2017

Quick Quotes Memories With LeeAnn

Greeting crafty friends, LeeAnn here with my first official project post with Quick Quotes. As I was going through the pictures on my phone I found this one, and it is so special that I had to use it as it went with my sentiment sheet perfectly. Below you will find the video I made of the process, The only thing I did not record was how to die cut the papers with my big shot. So, here we go.

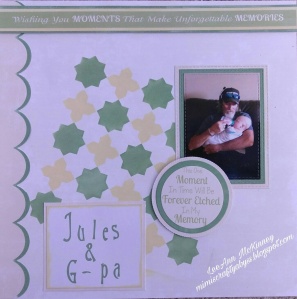
A little backstory, you will see I love to tell stories. Our granddaughter was born in October 2016 full term and 3 lbs 15 oz. Until she was almost 3 months old my husband did not hold her as she was so small and he was afraid. Well, we went over for a visit and when my daughter went to feed Jules now just over 7 lbs, he said he would do it. This photo was required at that point. She was so peaceful in his arms, and he was just beaming.
I chose the paper I wanted to use which was from an upcoming set called WINDSONG #102 AND #103. The sentiments I used is from CHIFFON #500


Using my trimmer I carefully extracted the sentiment sections I wanted and then used various dies and my big shot to cut the necessary layers. I used white cardstock to cut the layer that would eventually be Seafoam or Antique Linen. Once I had all my layers, the video recording began.
Using a set of two-step stencils, I started having a little inky fun. Positioning the first stencil where I wanted it, and using a blending sponge I filled in the spaces with Seafoam. I then placed the second stencil in place, and with another blending sponge I filled in with the Antique Linen. After setting those aside I then went to work adding the Seafoam and Antique Linen to the various layering pieces.
I then used my nano-stamp positioner and various letters from an alphabet stamp set to write Jules & G-pa, which is the name he chose for himself. I then used an E-Z Runner and foam squares to adhere all my pieces down.
I really hope you have enjoyed my first project with the Quick Quotes team, and here is the video to let you see the process as I played.

[youtube=https://www.youtube.com/watch?v=6zlb_KCdlcc&w=320&h=266]

Quick Quotes Supplies Used:
WindSong 102- Coming Soon
WindSong 103- Coming Soon
Chiffon 500
Seafoam
Antique Linen
Other Supplies Used:
Big Shot-Sizzix
Wonderland Stamp set- Joy Clair
Various Dies-Kat Scrappiness
Moroccan Tile Stencils- DCAM
Nano- DCAM
E-Z Runner- 3L
Foam Squares-3L
Blender Sponges-Ranger

Please come visit us again, and in the meantime, I am going to work on my next fun project for you. 


Friday, February 3, 2017

DCAM February Layout and Card

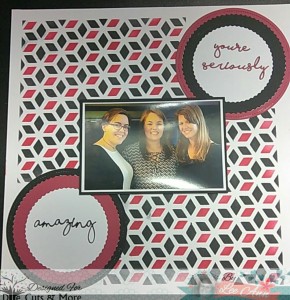
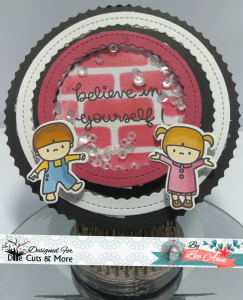
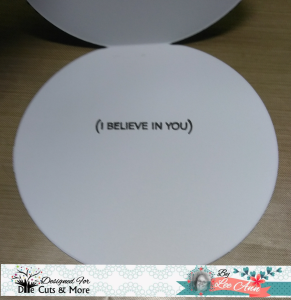
Hi there crafty friends, today I am over on the DCAM blog with a couple of fun projects. I will put the photos here, but please come over to the DCAM blog, leave some love and read how I made them.
12x12 Layout

Outside of Card

Inside of card
DCAM products used in these projects:

Crystal Clear Sequins
Inverted Circle Dies
Bricked Wall Stencil
Cubicles Stencils
You're Die

Seriously Die

Amazing Die
Stampoholic Nano

The website is updated with a new look and is ready to take orders from USA, Canada, Guam, Mexico, Australia and New Zealand, all other countries will be added soon. 
Thank you so much for playing along with us and have a great day. Please follow DCAM and the team on various social media platforms. 


Joy Clair, Chibitronics, Camping OH MY

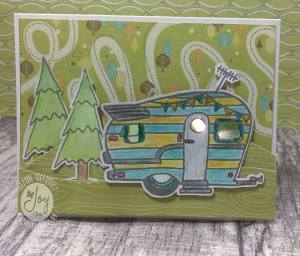
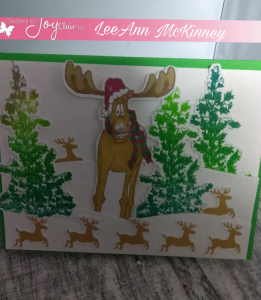
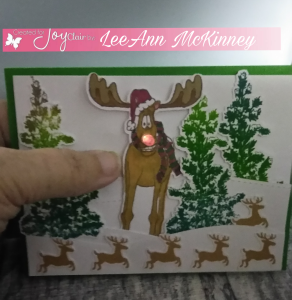
Hi there my crafty friends, today I am bringing you an adorable camping set new from Joy Clair, and the introduction of how to use the Chibitronics Lighting System in your crafting.

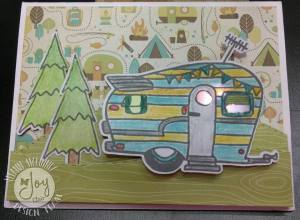
First let me start with the stamp set used... As soon as I saw this set was coming I knew the paper I would use with it. The background paper is from WRMK and it is called Happy Camper, from 2013.

While I did a video to show how I put this card together, it is just exactly that... putting it together. I actually made this video 3 different times, which meant making the project 3 different times, and FINALLY it is complete, first the video didn't save, then there was background noise that really irritated me and I could not get that sound layer to come off. SO... you have me talking while putting this project together for the last time. I am still not sure which version of the card I prefer, so I will show you both photos.


This second photo is the one seen in my video. 
[youtube=https://www.youtube.com/watch?v=9uN6td1u3Lo&w=320&h=266]

Step by step pictorial of how I made this project. 
1. I downloaded the SVG file that went with the stamp set and used the Scan n Cut to cut the images I wanted to use. 

2. I used my Archival Ink color Watering Can to stamp out the images with my Stampoholic in order to be able to double stamp if needed.

3. While the ink was drying, I used my landscaping dies to cut out two different scene pieces for my project. 

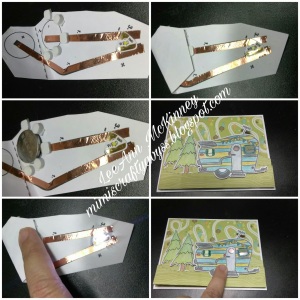
4. Using the Chibitronics Intro Kit, I decided which pattern would be best for me to use for this project, where the circuit could be hidden behind the scene, and still get the desired effect. The great thing about this sample set that I purchased is that there is 3 LED lights, enough of the Conductive Copper Tape for a few projects. The CR2032 batteries I have several of already and they can be purchased easily. This set also comes with 3 circuit templates, and there are a great many more available on the Cibitronics website

5. So, layout the copper tape, attaching the LED being very careful not to touch the back side where it attaches to the copper tape. You do not want the oils from your hands to interrupt the connection. 

6. At this point, I colored the images with watercolor pencils and then set about finalizing the card. 

I have to say, as I said in the video, I have been making light up cards for a couple years, and this is the EASIEST way to make them, and I am so happy to have this in my paper-crafting arsenal now. You WILL see more light up projects from me in the future. 

If you would like to see another light up card I have made, here is the post.


Items used in this project:
Chibitronics Intro Set
Joy Clair Happy Camper
WRMK Happy Campers Pattern Paper
WRMK Letterpress Card Base
Ranger Archival Watering Can
CTMH Watercolor Pencils
3L Foam Dots
3L E-Z Runner